When installing new furniture or renovating, homeowners often face the decision of whether to keep skirting boards or remove them. This choice can impact both the aesthetics and functionality of a room, as skirting boards provide protection and a finished look but may interfere with flush furniture installations.
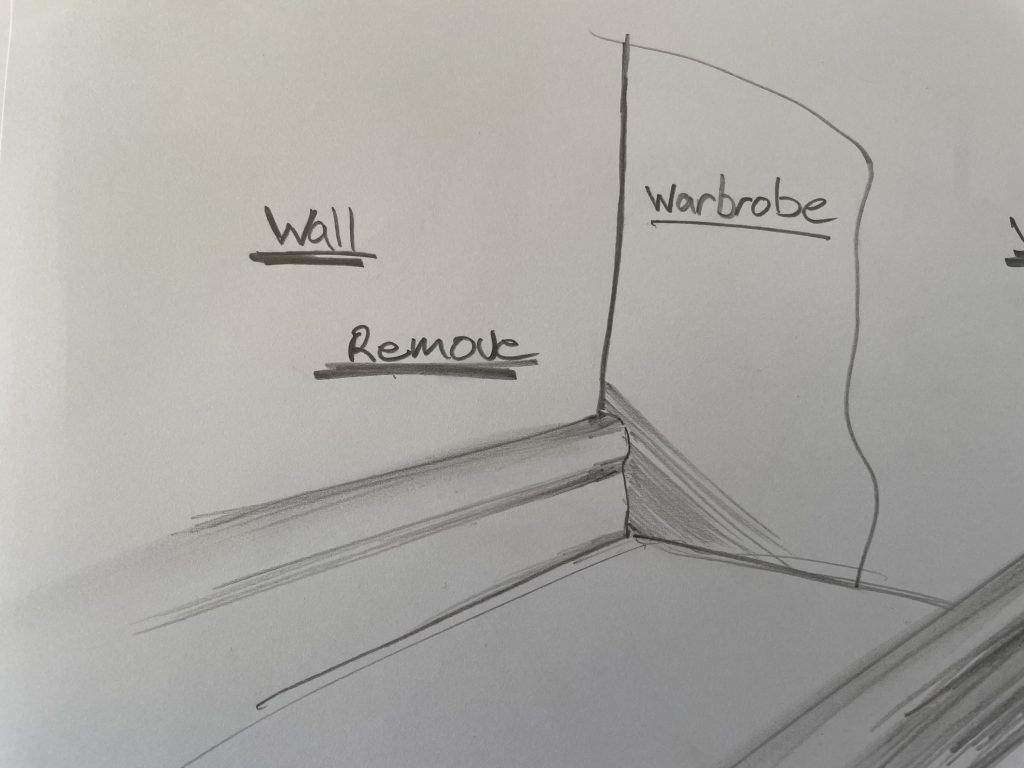
Option 1: Remove the Skirting
Removing the skirting allows the wardrobe to sit flush against the wall, making it easier to secure the wardrobe in place. However, it’s advisable to keep the skirting in case you need to replace it later. This is particularly important for older homes where the original skirting might no longer be available and would require custom fabrication to match the existing moldings. Custom skirting can be quite expensive.
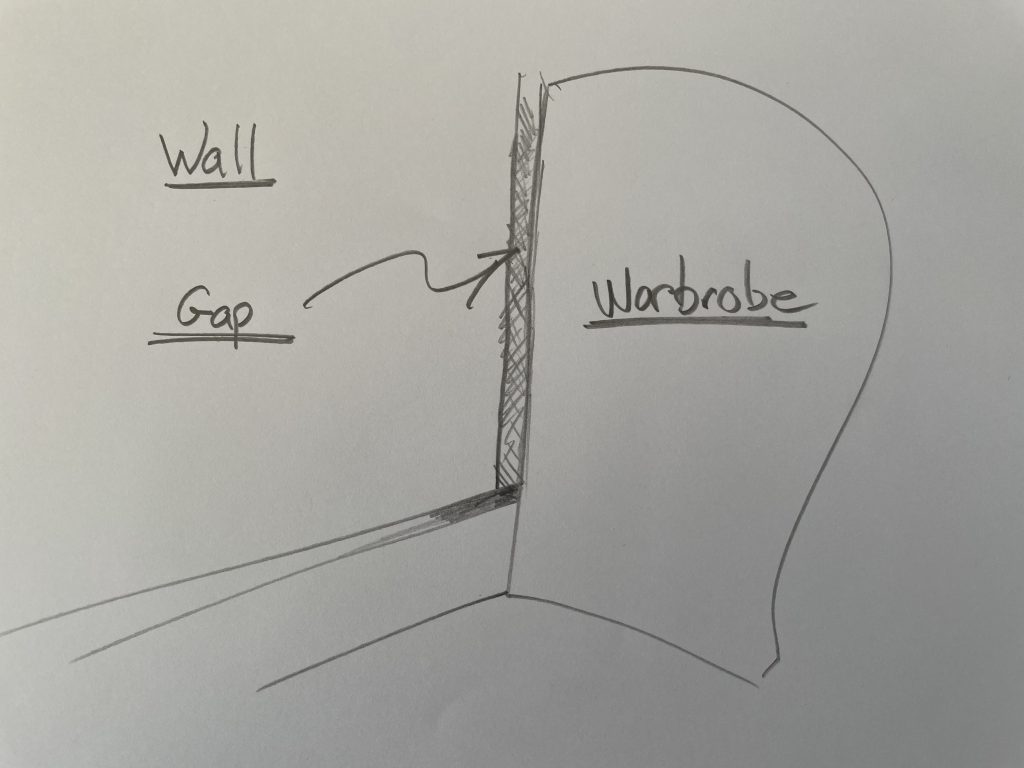
Option 2: Fill or Cover the Gap
If you prefer not to remove the skirting, you can fill or cover the gap between the wall and the wardrobe:
- Add a Packer: Attach a packer to the wall to create a surface for securing the wardrobe.
- Add Trims: Use trims to cover the gap. Depending on the thickness of your skirting (typically 12mm to 18mm), you can choose trims that either make the surface flush or are large enough to cover the gap entirely.
Step by Step – Removing Skirting
If you’ve never removed skirting before, it can be tricky, especially without the right tools. Having proper tools will make the job easier and prevent extra work.
Recommended Tools:
- Hammer, Chisel, Measuring Tape, Stanley Knife – Essential items for any handyman.
- Crowbar/Wrecking Bar – Helps to pry skirting boards off walls. Use only against studs to avoid damaging the plasterboard.
- Stud Finder – Helps locate studs and avoid potential wiring or power along the skirting board.
- Multi-Tool – Great for cutting the skirting board without fully removing it. A worthwhile investment for many projects.
How to Remove Skirting Board:
- Run a knife along the top of the skirting board to cut through the paint seal between the board and the wall.
- Find and mark the studs on the wall. This helps you place your crowbar or chisel correctly.
- Check for any electrical wiring along the skirting to avoid accidents.
- If cutting is required, measure and cut the skirting board using a Multi-Tool. If you don’t have one, you’ll need to remove the board fully.
- Pry the skirting away from the wall, using your crowbar or chisel where you’ve marked the studs. Locate nails and pry them out.
- In older homes, skirting boards were often heavily nailed, making removal harder. Modern homes typically use liquid nails and smaller nails, but liquid nails may pull off the top layer of plasterboard. Be careful to avoid damage.
- Once the skirting is removed, clean up the wall. You may need to patch any damage, remove nails, and sand paint buildup.
All done! If you have any questions, feel free to add a comment below. We’re here to help with any further tips or guidance you may need.
Leave a Reply